
Help Center Items
Add an item
Create an item with what you paid, where it is, and how it's doing.
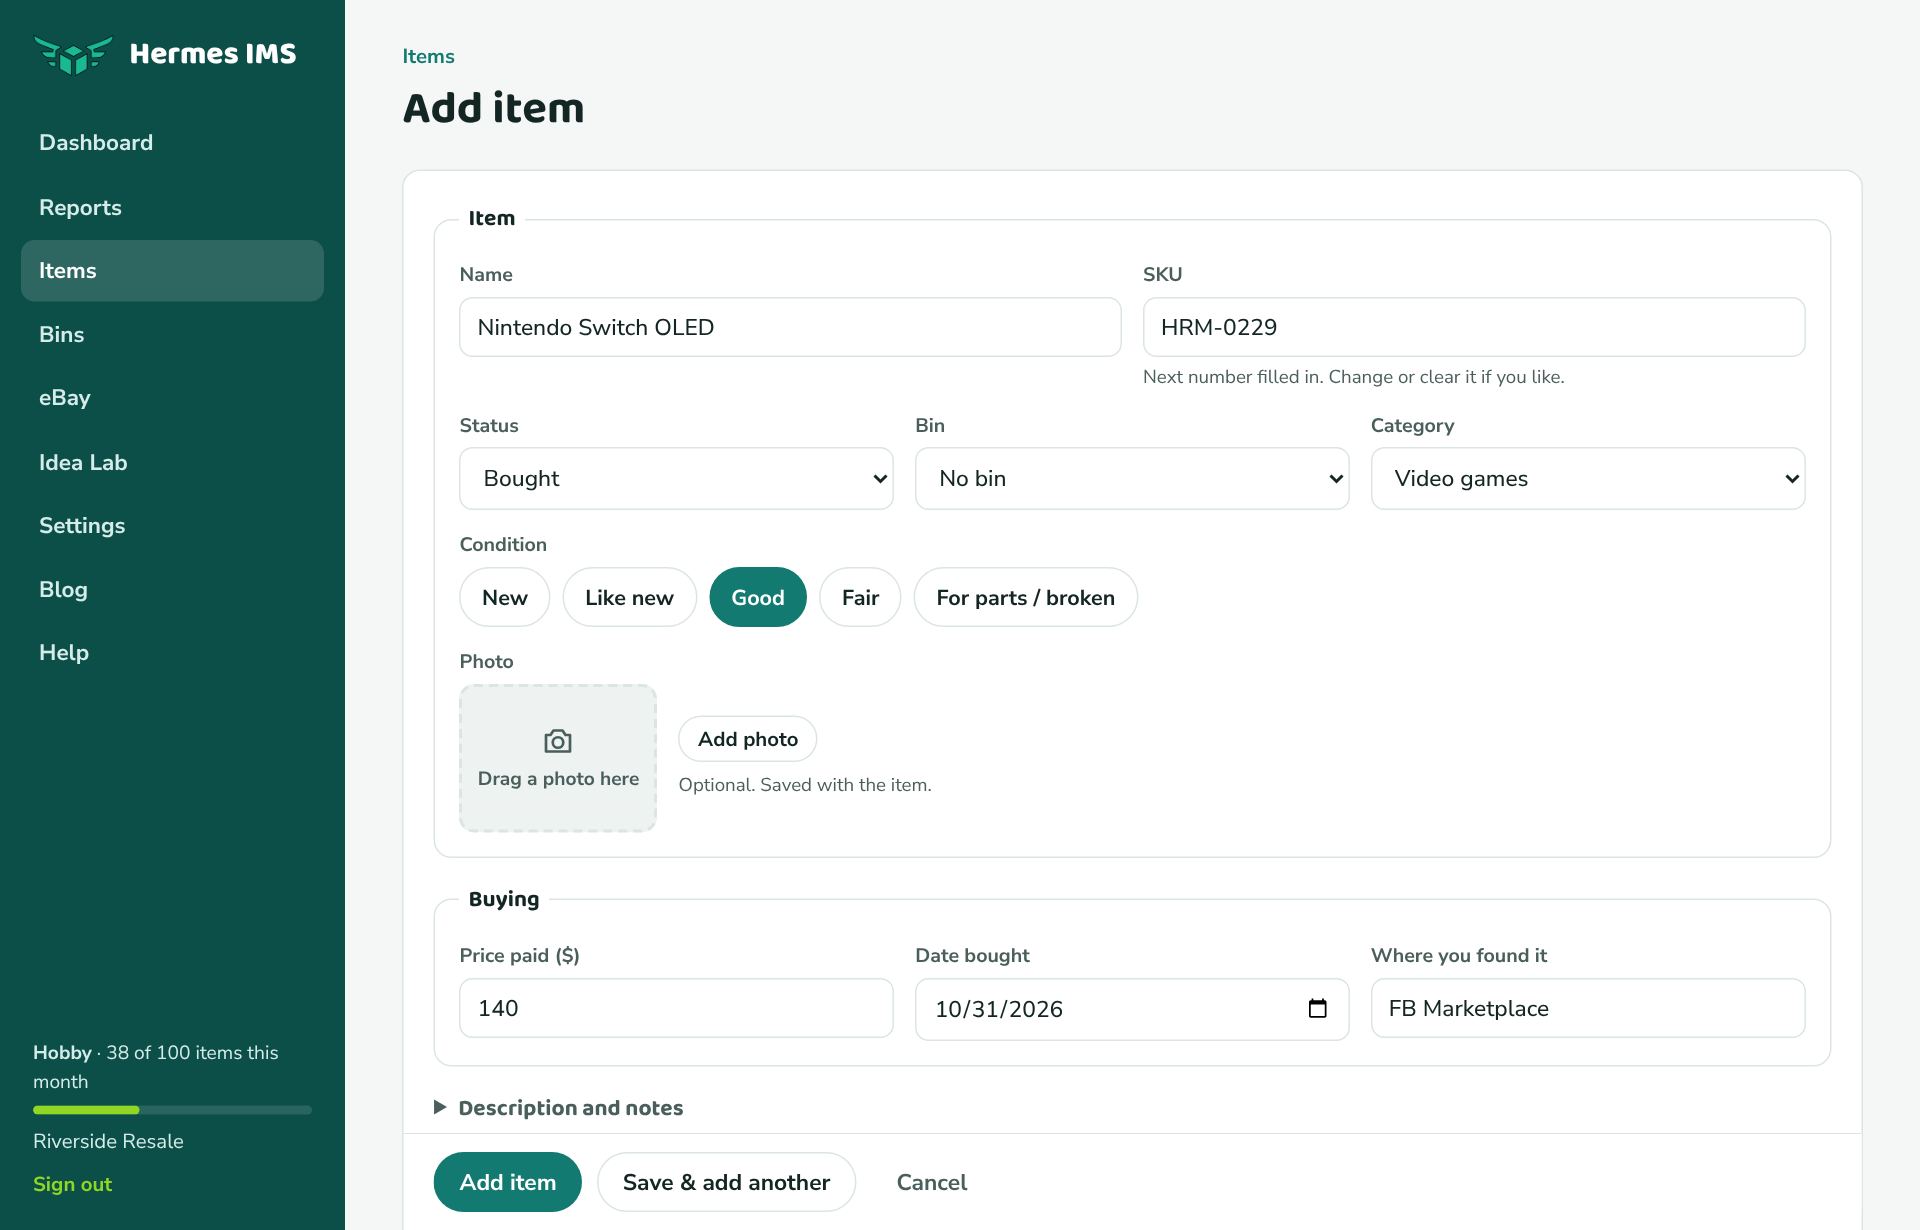
- Click Add item on the dashboard, or go to Items → Add item.
- Under Item, enter a Name (required). The SKU is filled in with your next number, and Bin and Category start as the ones you used last; change any of them. Tap a Condition: New, Like new, Good, Fair, or For parts / broken. Add a Photo if you like: take one, choose one, or drag it in.
- Under Buying, enter the Price paid and Where you found it (Goodwill, an estate sale, FB Marketplace…). Places you've used before are suggested as you type. Date bought starts as today.
- If it's already for sale, set Status to Listed. The Listing section appears: enter your asking price, and add the platform and a link to the listing.
- If it's already sold, set Status to Sold, and the Sale and Shipping sections appear. See Record a sale.
- Want a description or private notes? Open Description and notes.
- Click Add item (or press Enter). You land on the item's page, where you can add a photo, parts, and notes. Adding several from one trip? Click Save & add another: you get a fresh form that keeps the bin, category, place, and date.
Which fields matter most
- Price paid is the most important number after the sale price. Without it, profit looks bigger than it is.
- Bin saves you hunting for the item when it sells.
- Where you found it powers the *By source* report, which shows which stores and sales are worth your time.